|
PhotoShop Picture Retouching
Photo retouching is one of the main reasons why more and more people
are changing photos into digital media. This simple tutorial should
show you, how to spice up your photos, correct errors, and do all
sorts of stuff with it.
Lets just try to get this boy (my cousin;) into somekind of a shape,
without the background, and remove certain things which make the
picture "disturbing". Maybe make him a bit happier too
:)
|
|
|
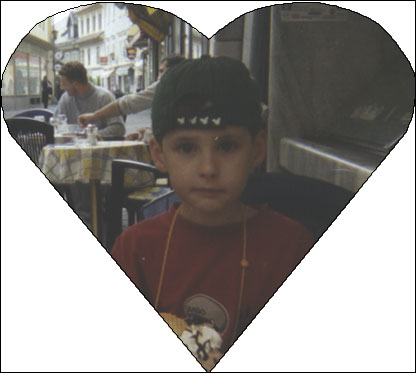
Thats the startoff image. Just any normal
image. It can be dirty, include elemts and objects u dont
want, anything. Important is tough that the face and other
complex structures are mainly "intact".
|
| |
|
|
|
Decide on a shape, I choose a heart,
you can use whatever you want.
Get the image in the right position now, otherwise you might
have trouble later changing it.
|
| |
|
|
|
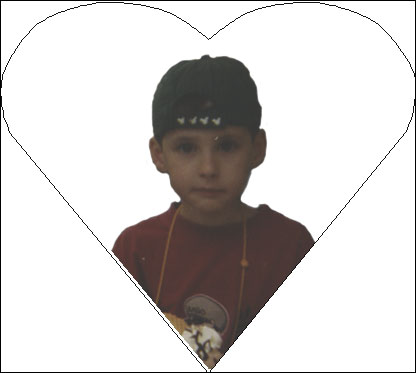
Using the Eraser tool in mode:paintbrush,
Rub out the background, if you make a mistake, use the History
windows to go back a step to undo the error.
|
| |
|
|
|
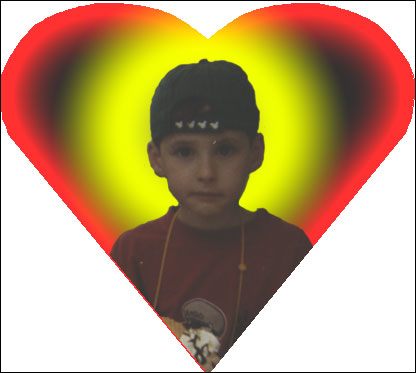
Here I added some kind of background
into the picture, its just some simple color fade in - fade
out thing, done with the gradient tool. You can insert images
too, just experiment a bit.
|
| |
|
|
|
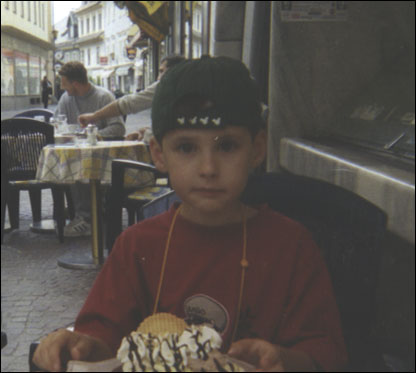
I noticed that the image had certain
"white spots" in it, (we might want to call it dirt;)).
Also the Ice-cream and the yellow string are not really nessacary,
so I decided to get ride of them. Select the clone tool (or
press S), now select an area which looks similar to the area
you want to get rid of. If you found one, press the ALT key,
your cursor will change shape. While keeping ALT pressed select
the area which looks similar to the area u wanna get ride
off. Now paint over the area. (Its a bit hard to explain,
and might need some practice, but after a few attempts you
will surely get there)
|
| |
|
|
|
Nearly done. Here I just modified a little but important
part of the picture, the smile. But wait, he wasn't smiling
at all...we can change that with the smudge tool(press R)
Zoom in at the very left at the mouth and push the mouth up
a bit, so it looks like he's smiling, (try using a very soft
and medium sized brush to do this). Do the same at the right
side. And voila, here we go. Looks ok doesn't it?
With a bit more time, you can produce much better and
more interesting results.
Hope this helped you
P.S. The picture was actually made for my cousins birthday,
to be printed on a couple of t-shirts, that why the heart
;) Just if you were wondering
|
|